
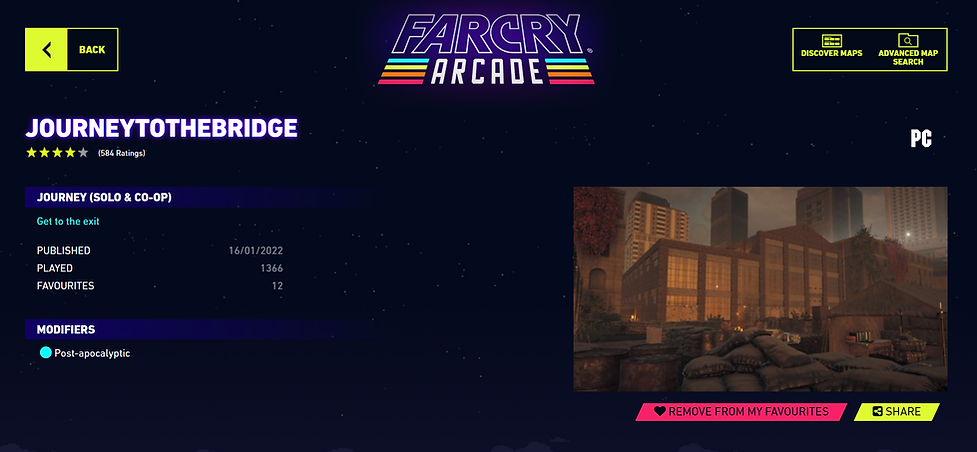
Journey To The Bridge
Reach the bridge and escape the post-apocalyptic city by sunset
Design Brief
-
Make a 'The Last of us' inspired level which feels like a journey to a clear landmark, the Bridge
-
Level with branching paths, exploration and verticality
-
Encounters built around two different enemy factions with environments that compliment gameplay and a variety of playstyles
-
Build a realistic piece of architecture at the climax of the level that feels part of the surrounding city
-
Build the level using the Far Cry 5 level editor and publish it on Arcade
Gameplay Playthrough
The Design Process
Level Structure
The Level is structured around a journey to a distant landmark and to escape the city before the sunsets. To achieve this, I choose to hide and then reveal views of the bridge at various points in the level to establish progression. With each reveal the bridge becomes closer and closer to the player, marking their progress through the level. The level is broken down into four distinct areas, each with short buffer zones in-between to provide a break from combat:
-
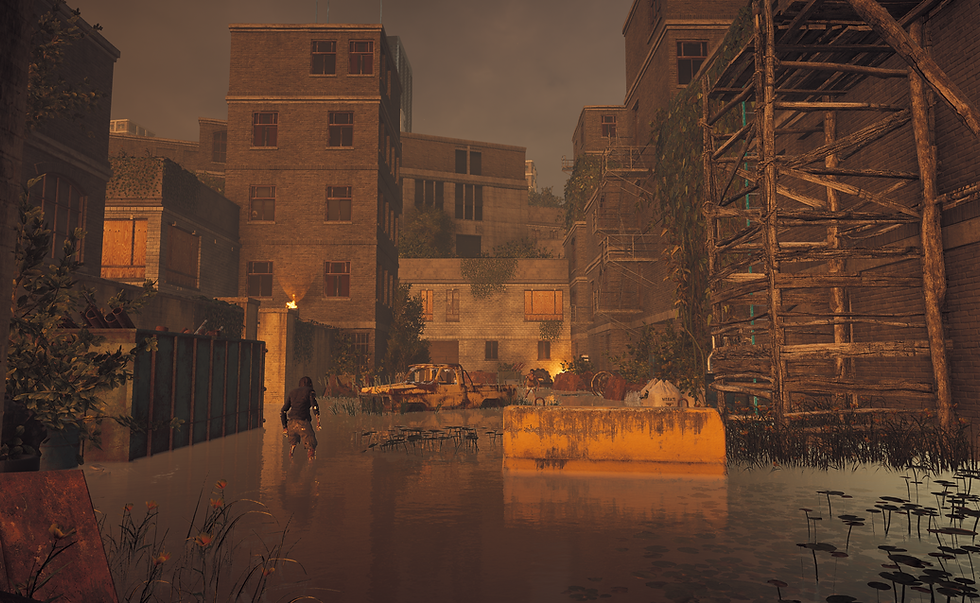
Area 01 - The Alleyways
-
Area 02 - The Street
-
Area 03 - The Warehouse
-
Area 04 - The Bridge
Level Map and Bridge Views


Encounter Design
Through the design of the level it was important that while all the four areas should thematically be connected through views of the bridge and the setting of a post apocalyptic city, it was also important for structure to ensure each area had it's own a clear identity. This was achieved through encounter design that took advantage of both the environment and by providing variation in enemy type:
-
Area 01 - The Alleyway, Zombie encounter in narrow branching corridors where you climb onto the more open roofs to escape
-
Area 02 - The Street, Enemy Human encounter on a long street divided by a wall that provides two lanes to advance along
-
Area 03 - The Warehouse, Human encounter, which takes place inside an enemy outpost with multiple ways to enter the building
-
Area 04 - The Bridge, Mix of Zombies and Humans, a cinematic ending where humans and zombies fight while you advance
Area 01 - The Alleyway

The Alleyway - Encounter and Level Path
The Alleyway is the start of the map and set at the lowest part of the city which is why it is partially flooded during the rainy weather. The area is built to feel narrow with long corridors where the zombies need to run towards you and gives the players time to react. You start the level with no weapons, which gives the player the immediate objective of exploring to find something to fight with.
An important affordance I wanted to try and teach the player is that when you see a fire barrel it is signposting a point of interest. In the first area I use the fire to either indicate places where you can find weapons or to show the player potential exits. I wanted this area to have a clear vertical progression, where you start at the lowest part, in the water surrounded by zombies and slowly weave your way through zombie filled alleys before climbing up to the rooftops which are all connected by timber bridges which lead you back to the start of the second alleyway where you can now jump over a fence and escape to next area - the Street.
Area 02 - The Street


The Street - Encounter and Level Path
The Street is where we switch from fighting zombies to fighting humans, this change in enemy type meant the area needed to be designed to provide more cover, with safe vantage points and more distance between the player and the enemy. Fire is used in this area to signpost the small enemy outpost on the upper street, showing the player the switch in enemy type as they can see the human enemy from a safe place and the watchtower at the end of the street where there is a deadly sniper stationed.
The area is split into two lanes, the upper and lower street which curve and converge to a single level at the end of the street which is blocked off by a barricade with a watchtower. The player can choose which lane to advance along and can switch between them at any point, each lane offers it's own challenges and advantages. The upper lane, has a small outpost which the player can see when entering the street. This small outpost can be entered in a number of ways. There are more enemies here but clearing the small outpost offers the reward of better weapons and a more protected vantage point of the street. The lower lane, has fewer enemies and more cover provided by the abandoned cars, it is easier to sneak up on enemies and get closer to them before having to engage in combat, it also has the advantage of avoiding the small outpost but this also means the player bypasses the reward of better guns for taking the safer route.
Which ever lane you choose, after negotiating the street and overcoming the enemies at the watchtower, you cross the barricade and enter the next area - The Warehouse.
Area 03 - The Warehouse


The Warehouse - Encounter and Level Path
The Warehouse is main encounter of the level and is where we switch from exterior setting to an interior setting. The Outpost building is split into two sections, the front atrium working area and the back office area. The building has three floors, ground floor (working areas and offices), second floor (sleeping areas) and the roof (the exit). The Warehouse can be entered at 6 different points spaced around it's perimeter, each offering access to a different floor. I wanted to provide a number of ways to enter the outpost to reward the player for exploring and give them a choice in how they wanted to progress and control in how they would like to engage in or avoid combat during this encounter.
The front working area, is a triple height room wrapped in tall industrial windows and connected by steel walkways and bridges. It offers clear lines of sight between floors and the combat that takes place here has a good sense of verticality. The back office rooms, are smaller tighter areas with limited lines of sight and offers more tense combat and opportunities to stealth. As for how you exit the area, you will need to fight or sneak your way to the roof of the outpost. There is a staircase at the back of the building which can be used to access any floor or there is a staircase that wraps around the main atrium space in the warehouse.
Fire is used in this area to signpost exits along with signs that point the way. The Warehouse was constructed using generic shapes and props from the far cry 5 engine which I combined to make a building which acts as the focal point of the level and is built in a realistic way so that feels like part of the surrounding city.
Area 04 - The Bridge


The Bridge - Encounter and Level Path
The Bridge is the final stretch of the level, I wanted it to offer a dramatic conclusion to the level so I set it at night. Before the encounter I made sure to provide ammo, health and body armor to the player in a safe place at the start of the area. Giant fires frame the final barricade of the level which is lit by artificial white light and the contrast helps set the tone of the encounter.
This Encounter uses a mix of enemies, the bridge is covered in zombies and at the end is a barricade defended by humans. The two factions are fighting and the player needs to approach, either fighting their way forward or sneaking past the zombies. Since the humans are defending the barricade against the zombies, they will not notice the player as quickly as they normally would, this offers a big gameplay advantage to the player but also gives the encounter an interesting timed element, this because as soon as all the zombies are dead the barricade will become harder to attack. Once the barricade is cleared the player will cross to find the helicopter framed by four artificial lights, once the player climbs into the helicopter they have won the level and escape the city.
Playtesting and Publishing the map
Refining Gameplay through playtesting and publishing the map on Far Cry Arcade
Once I had a working first draft of the level, I asked friends in the industry to playtest it. While they played, I watched and recorded their sessions and after they had finished the level I asked them for their feedback. Overall the feedback was incredibly valuable to me and the collaboration between the player and myself really helped guide me when refining the level's gameplay to deliver a more polished level design flow.
Once I was happy with the changes made to the level, I decided to publish 'Journey to the Bridge' on Far Cry Arcade. I was really blown away by the response to the level and really appreciated that players seemed to enjoy playing my level. If you would like to play the level yourself you can find it under the name 'JOURNEYTOTHEBRIDGE' on Far Cry Arcade.
Learning Outcomes
Lessons learned through the making of 'Journey to the Bridge'
I had a lot of fun making this map and really enjoyed working within the Far Cry 5 editor, that said I do wish this editor had more scripting options, while I like working with restrictions, it would have been nice to have more control over AI behavior and other gameplay systems.
One other thing I really appreciated was that through making this level, it allowed me to test out, implement and explore level design principles I had learned from my 'God of War : Case Study', I was able to bring concepts like, using landmarks for progression, creating variation in combat encounters by using different enemy factions and using fire as a way to signpost areas of interest, to construct a level that I am really proud of.
I was really happy with how the Warehouse building turned out and it was a lot of fun to push myself to make a piece of architecture that felt believable in the setting of the surrounding post-apocalyptic city.
I also learned a great deal about my process and own level design, through playtesting and getting feedback on the level and this stage of the process gave me a clear direction for how I could refine gameplay to deliver a more polished level design flow. It was also really nice to have the opportunity to publish my level on the Far Cry Arcade, its awesome to see that people seem to really like the level and having fun playing something I made.
One question I asked myself at the end of making this was 'are the level design principles demonstrated in this non-linear branching path level applicable to other types of levels, for example, open world level design?' I was thinking about this quite a bit and I think the answer is yes. The Principles, Process and Implementation shown in this project would be skills I believe would be easily transferable to open world level design, as they are both built built on a strong foundation that aims to provide engaging gameplay to the player in a environment that feels visually engaging.